Not joined yet? Register for free and enjoy features such as alerts, private messaging and viewing latest posts and topics.

Beast 2.0 Modding

Discuss your latest mods or ideas, and anything to do with the BMW X5 (E53).
Raj
Lifer
Lifer
Posts: 4512
Joined: Tue Sep 21, 2010 11:30 pm
Location: Midlands

Beast 2.0 Modding

Post by Raj » Sun Sep 13, 2020 10:17 pm

Adding some starting pics of the Beast before I started.

Just completely standard really but the pics hide the tired paintwork and leather etc.

Image

Image

Image

Image

Image

The coating on the black front plastic on the bumper had peeled and rear bumper had a slight dent.

Image

So figured I’d start a new thread for the swapping, modding and restoration of the new beastly 4.8is I bought last weekend.

Figured I’d start with cleaning out the spare wheel well and spare etc as it was all pretty messy:

Image

Then onto the AC Schnitzer lip spoiler. As it’s bonded on to the panel, I swapped the whole thing over. Pretty straight forward and again get to clean this 15 year old mess:

Image

Subtle but makes such a difference:

Image

Image

Image

Will fit the AC Schnitzer CF trim next and retrofit the rear heated seats.
Last edited by Raj on Sun Nov 08, 2020 9:53 pm, edited 1 time in total.

sapphireblack
Snr Member
Snr Member
Posts: 1658
Joined: Mon Apr 18, 2011 8:30 am
Location: Kent, garden of England

Re: Beast 2.0 Modding

Post by sapphireblack » Mon Sep 14, 2020 5:56 am

I'd have thought swapping the wheels would be a priority as so straightforward. I had a set of Dynamics on my E63, nice but a pita to clean

Raj
Lifer
Lifer
Posts: 4512
Joined: Tue Sep 21, 2010 11:30 pm
Location: Midlands

Re: Beast 2.0 Modding

Post by Raj » Mon Sep 14, 2020 7:40 am

sapphireblack wrote: Mon Sep 14, 2020 5:56 am I'd have thought swapping the wheels would be a priority as so straightforward. I had a set of Dynamics on my E63, nice but a pita to clean
That's why I'm in no rush as my wife is still using the old one so happy to keep them on there till later on. But may be being refurbed soon so that will be when I swap them.
Trying to get the other more time consuming bits done first.

sapphireblack
Snr Member
Snr Member
Posts: 1658
Joined: Mon Apr 18, 2011 8:30 am
Location: Kent, garden of England

Re: Beast 2.0 Modding

Post by sapphireblack » Mon Sep 14, 2020 8:03 am

You certainly like to create a challenge for yourself. I remember the extensive and obviously expensive works on the original car. If you're creating a clone, i imagine it will be an equally great outcome :thumbsup:

Raj
Lifer
Lifer
Posts: 4512
Joined: Tue Sep 21, 2010 11:30 pm
Location: Midlands

Re: Beast 2.0 Modding

Post by Raj » Mon Sep 14, 2020 8:28 am

sapphireblack wrote: Mon Sep 14, 2020 8:03 am You certainly like to create a challenge for yourself. I remember the extensive and obviously expensive works on the original car. If you're creating a clone, i imagine it will be an equally great outcome :thumbsup:
Thanks buddy for the kind words. It's crazy it was so long ago with the original one. Yeah the original was definitely a bigger undertaking though. Luckily as most is just swapping over it's far easier (and definitely cheaper 8) ). Exterior wise I plan to just swap the colour coded trim over and get it painted at the same time so again far cheaper than the original undertaking. Need to get it booked in to swap the exhaust over though.

All this because my wife wants exactly the same car in essence at the end of it. I did say we could upgrade to something newer but tbh like myself, she loves it too much. Still a rare sight to see a 4.8 around.

sapphireblack
Snr Member
Snr Member
Posts: 1658
Joined: Mon Apr 18, 2011 8:30 am
Location: Kent, garden of England

Re: Beast 2.0 Modding

Post by sapphireblack » Mon Sep 14, 2020 8:51 am

I was tempted a while ago now by an early version (2007 iirc) E70 4.8, a press launch car apparently.

At that time there was no M sport spec, the car i viewed was designated an SE with basically everything M Sport factory added. Call me stupid but i didn't want a SE no matter how dressed up it was.

I should probably have bought it tho, i wouldnt have wasted time and money buying the E63 only to end up in an E71 anyway, albeit a diesel and not a 4.8 X5 :oops:

Raj
Lifer
Lifer
Posts: 4512
Joined: Tue Sep 21, 2010 11:30 pm
Location: Midlands

Re: Beast 2.0 Modding

Post by Raj » Mon Sep 14, 2020 9:22 am

I was trying to get her into an E70 at least just for the slightly newer tech and something different but I do love working on the E53.

That would have been a nice motor tbf and the 4.8 is a really good engine on the whole. As always we live and learn and guess it all happens for a reason. The E71 is a great shape though and I was tempted by an X6M but they are still strong money.

User avatar
X5Sport
Global Moderator
Global Moderator
Posts: 18563
Joined: Fri Sep 03, 2010 4:09 pm
Location: Planet X6......

Re: Beast 2.0 Modding

Post by X5Sport » Mon Sep 14, 2020 11:03 am

And if anyone needs to find their nav GPS antenna - I thinks it’s the block with the Motorola ‘M’’ on it :)
:ant: Never anthropomorphise computers. They hate that.

Raj
Lifer
Lifer
Posts: 4512
Joined: Tue Sep 21, 2010 11:30 pm
Location: Midlands

Re: Beast 2.0 Modding

Post by Raj » Mon Sep 14, 2020 11:11 am

X5Sport wrote: Mon Sep 14, 2020 11:03 am And if anyone needs to find their nav GPS antenna - I thinks it’s the block with the Motorola ‘M’’ on it :)
:lol: yup there it is

Raj
Lifer
Lifer
Posts: 4512
Joined: Tue Sep 21, 2010 11:30 pm
Location: Midlands

Re: Beast 2.0 Modding

Post by Raj » Wed Sep 16, 2020 4:00 pm

So next up was fitting the AC Schnitzer CF trim which meant a full centre console removal and so both front seats up/out. Again gave a good opportunity to clean everything down and see what small bits and pieces I might need to order in from the dealers lol.

Driver seat up and out the way and it was quite messy.

Image

So the dash and door trims are very straight forward and simple pull off and push on but that centre console trim is screwed down from underneath.

Image

Image

A number of screws later and it's out. Also good opportunity to source the rear heated seats wiring hidden under the passenger front seat and route it out the back of the console area.

Image

Image

As you will see above I also now had the chance to get rid of that redundant wiring a previous owner had had fitted for their Tom Tom and phone from the looks of it.

Finally back in with the nice CF trim in place.

Image

Image

Next job will be the electric folding rear seat motors and rear sunblinds.

sapphireblack
Snr Member
Snr Member
Posts: 1658
Joined: Mon Apr 18, 2011 8:30 am
Location: Kent, garden of England

Re: Beast 2.0 Modding

Post by sapphireblack » Wed Sep 16, 2020 4:06 pm

Had a busy day then :thumbsup: :wink:

Raj
Lifer
Lifer
Posts: 4512
Joined: Tue Sep 21, 2010 11:30 pm
Location: Midlands

Re: Beast 2.0 Modding

Post by Raj » Wed Sep 16, 2020 10:57 pm

sapphireblack wrote: Wed Sep 16, 2020 4:06 pm Had a busy day then :thumbsup: :wink:
Yeah in between the day job so took longer than it should have lol.

max
Member
Member
Posts: 197
Joined: Sun Sep 25, 2011 11:14 am

Re: Beast 2.0 Modding

Post by max » Fri Sep 18, 2020 2:41 pm

Loving this Raj

Keep the updates coming :thumbsup:

Raj
Lifer
Lifer
Posts: 4512
Joined: Tue Sep 21, 2010 11:30 pm
Location: Midlands

Re: Beast 2.0 Modding

Post by Raj » Fri Sep 18, 2020 11:24 pm

max wrote: Fri Sep 18, 2020 2:41 pm Loving this Raj

Keep the updates coming :thumbsup:
Cheers bro. More done today lol.

Raj
Lifer
Lifer
Posts: 4512
Joined: Tue Sep 21, 2010 11:30 pm
Location: Midlands

Re: Beast 2.0 Modding

Post by Raj » Mon Sep 21, 2020 10:24 pm

So will get pics of the sunblinds up once fully complete and I didn't even get any pics of the rear electric reclining install :headbang: .

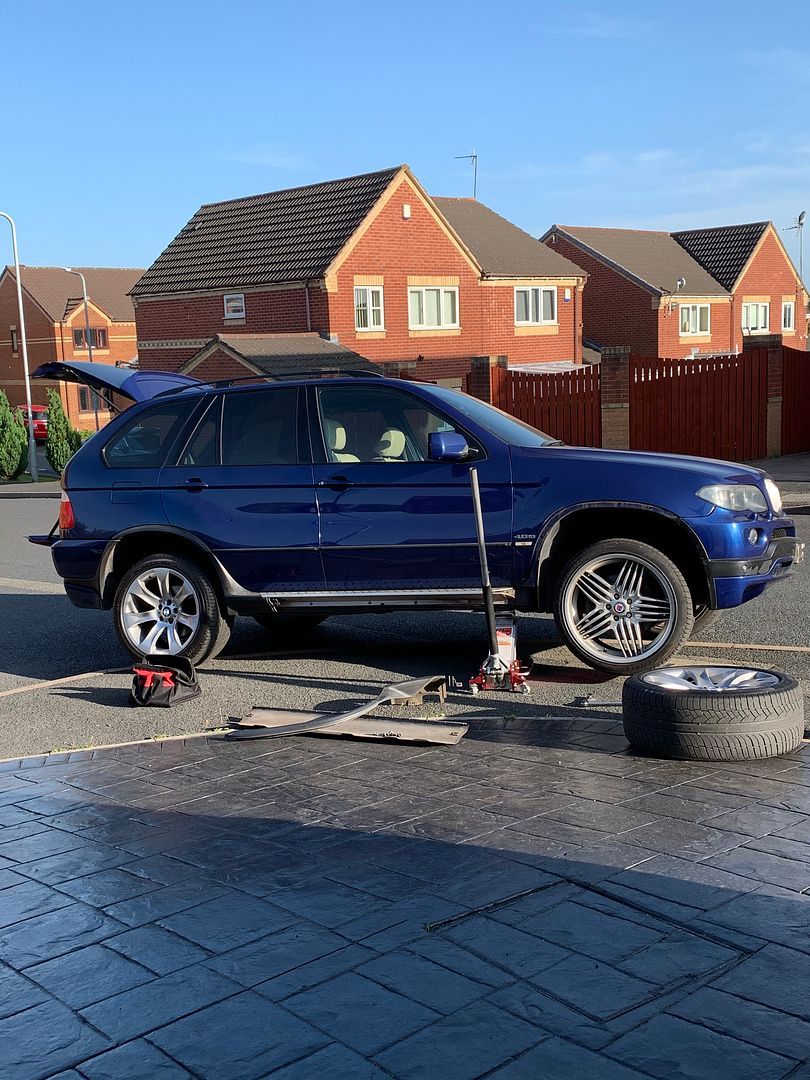
But for now the next big thing was swapping the standard black arch extension kit over to the old Beast and get the colour coded kit off ready for respray.

Luckily weather was nice so took a few hours to just get the side extensions swapped over.

Trusty trolley jacks and a couple of axle stands:

Image

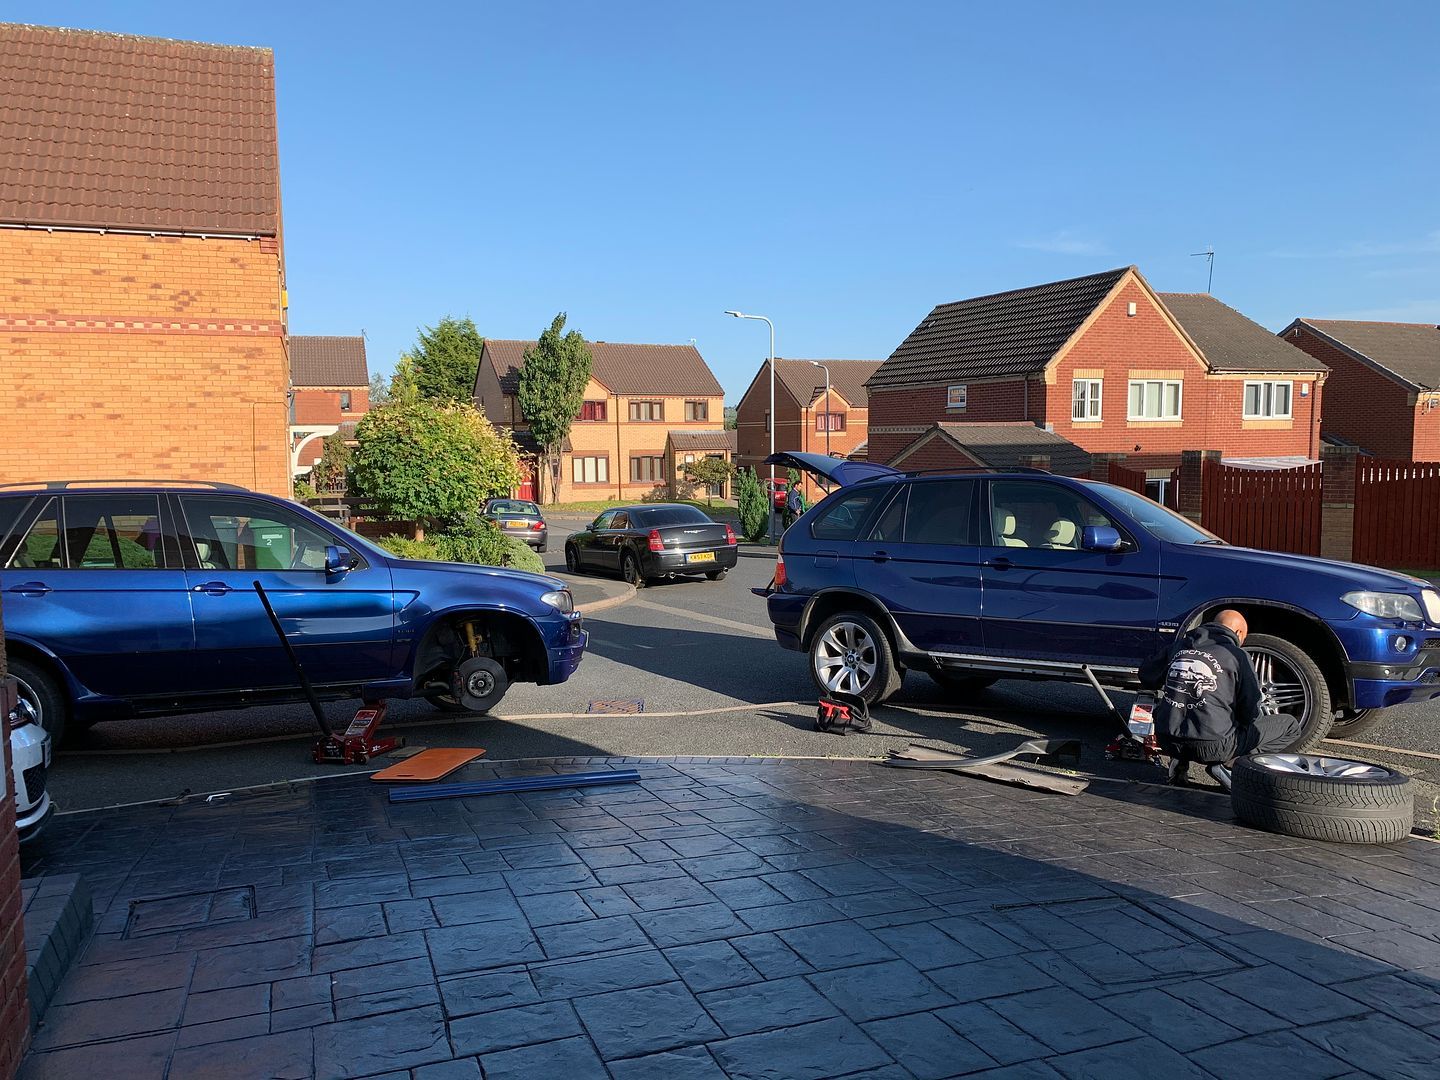
Side plastic extension pieces are quite straight forward to remove/fit. Same time needed to swap the Alpina's over too:

Image

Getting my son involved and luckily he quite enjoys it too:

Image

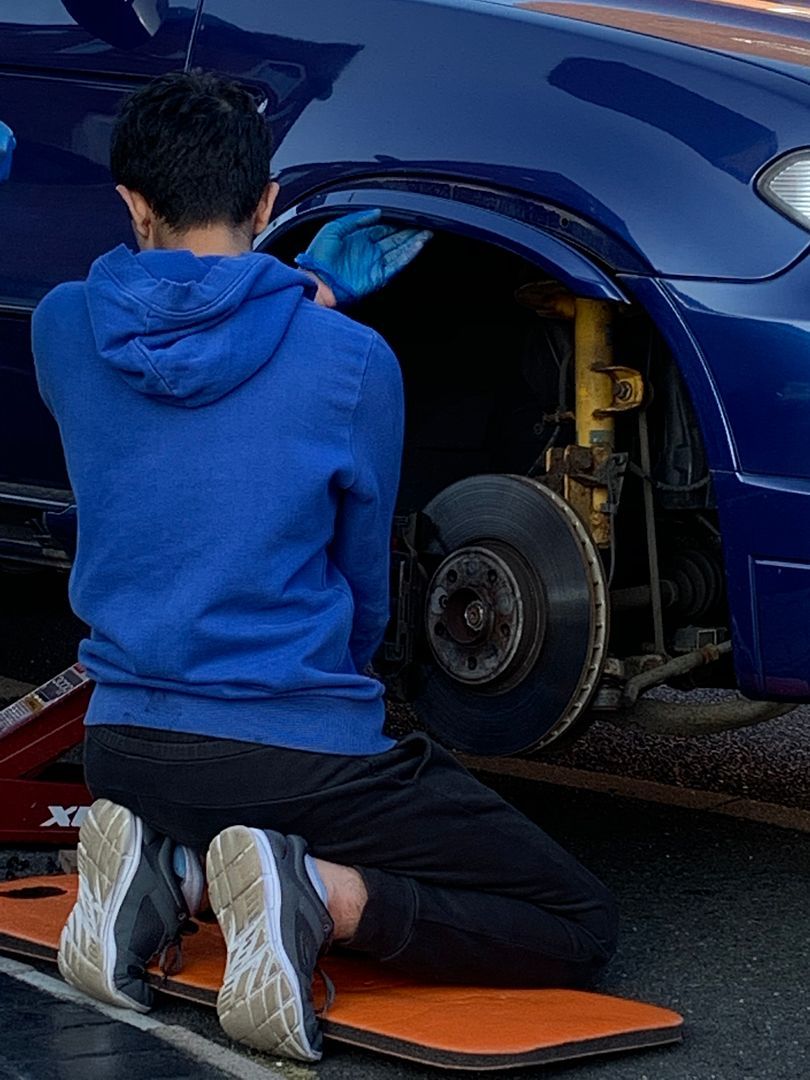
Only the aluminium sidestep to remove/swap now and that's just a number of bolts:

Image

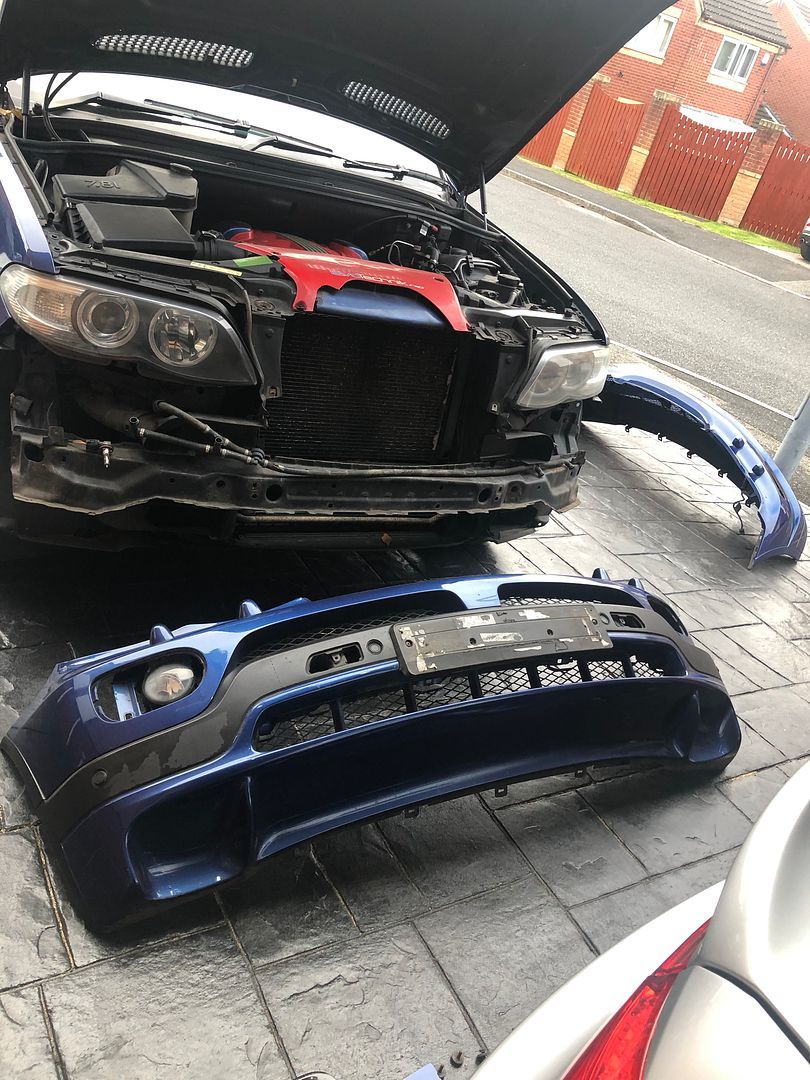
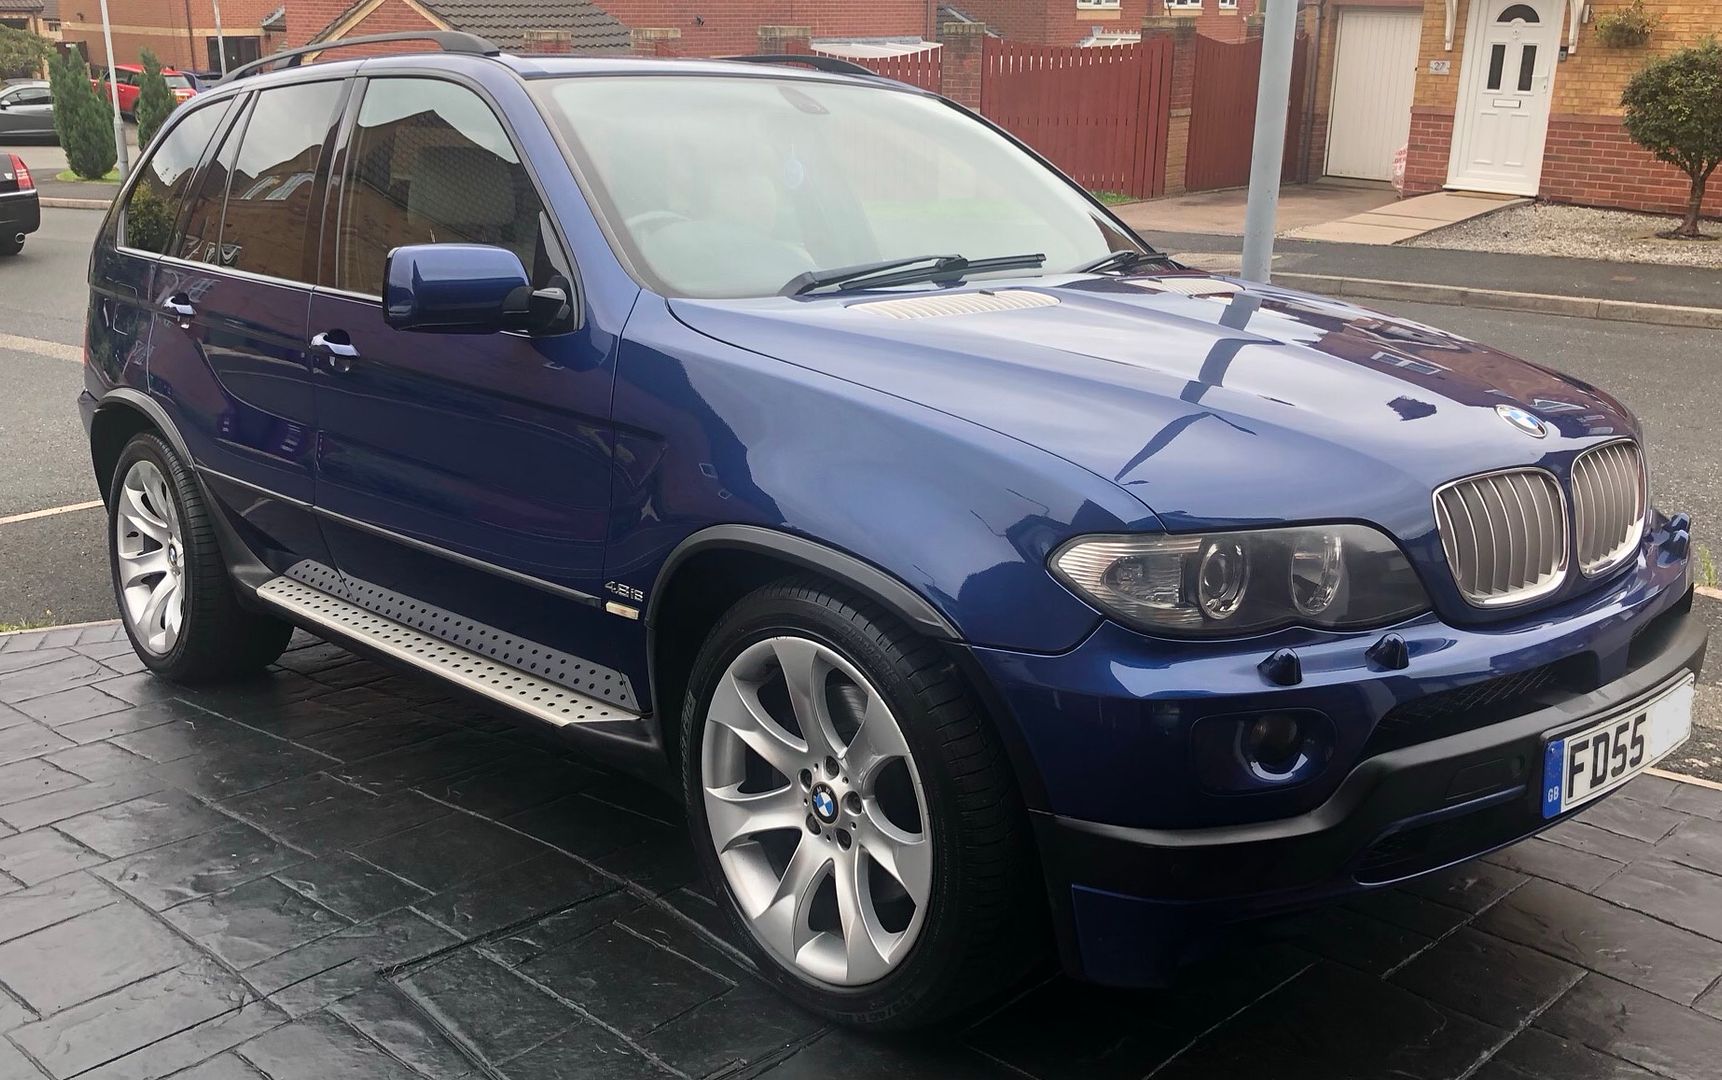
Front bumper is a straight forward affair too:

Image

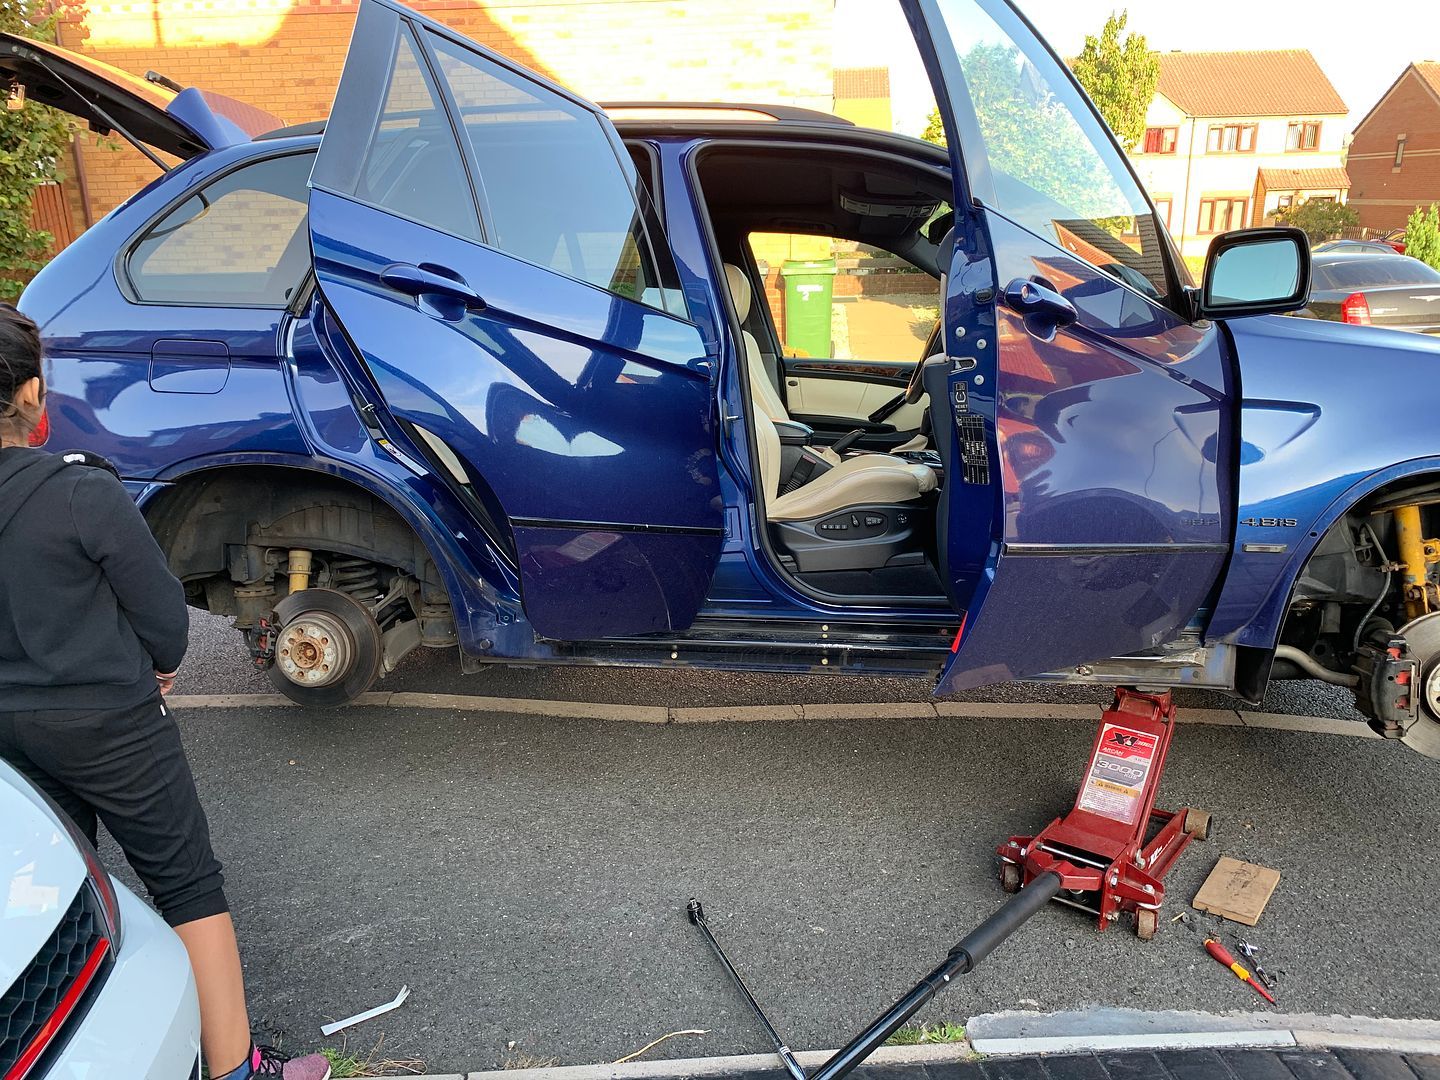
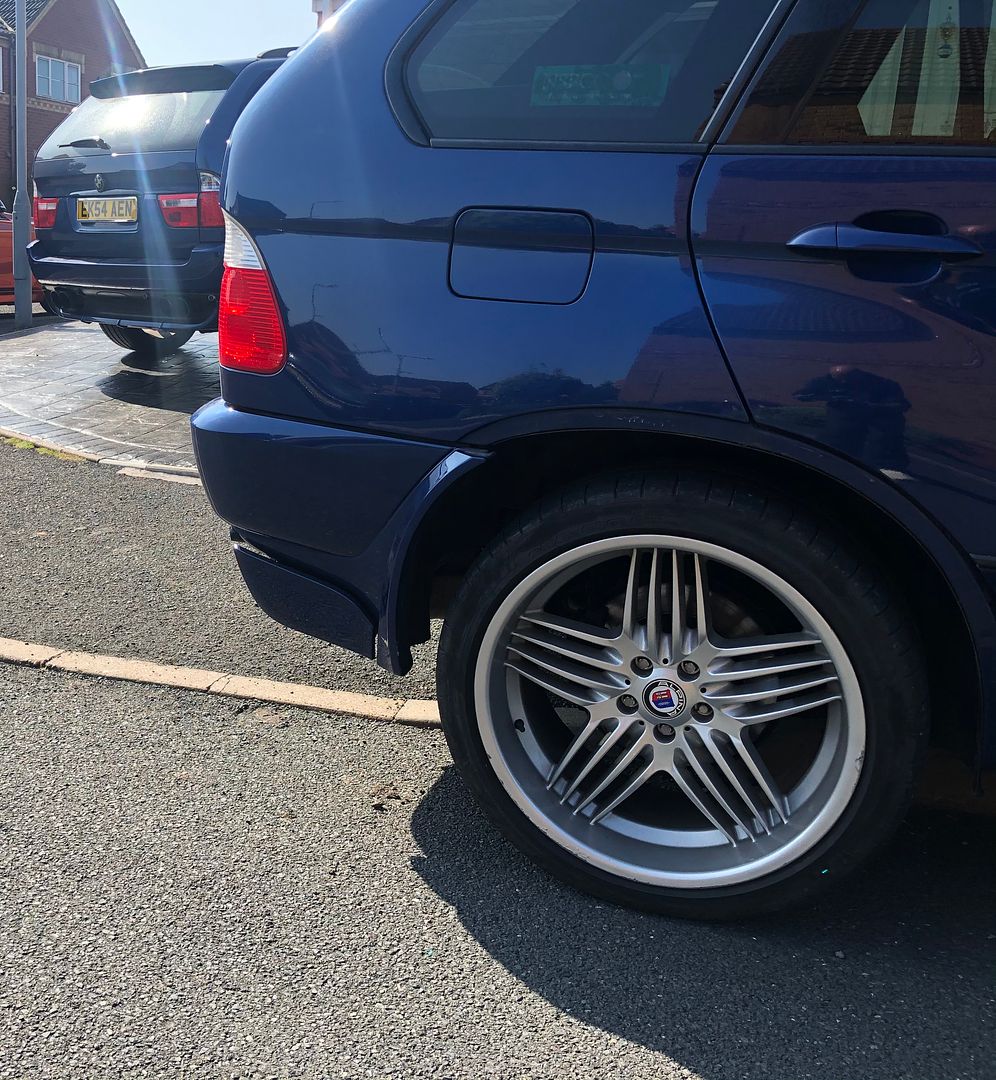
Rear bumper is bit more involved as easiest option is to remove the nuts so the whole bumper bar/bumper shock absorbers come out with the bumper:

Image

However we did discover the shocks needed swapping over as the new Beast has the Westfalia towbar fitted so using it's own mountings. But once swapped the bumpers go back on straight forward:

Image

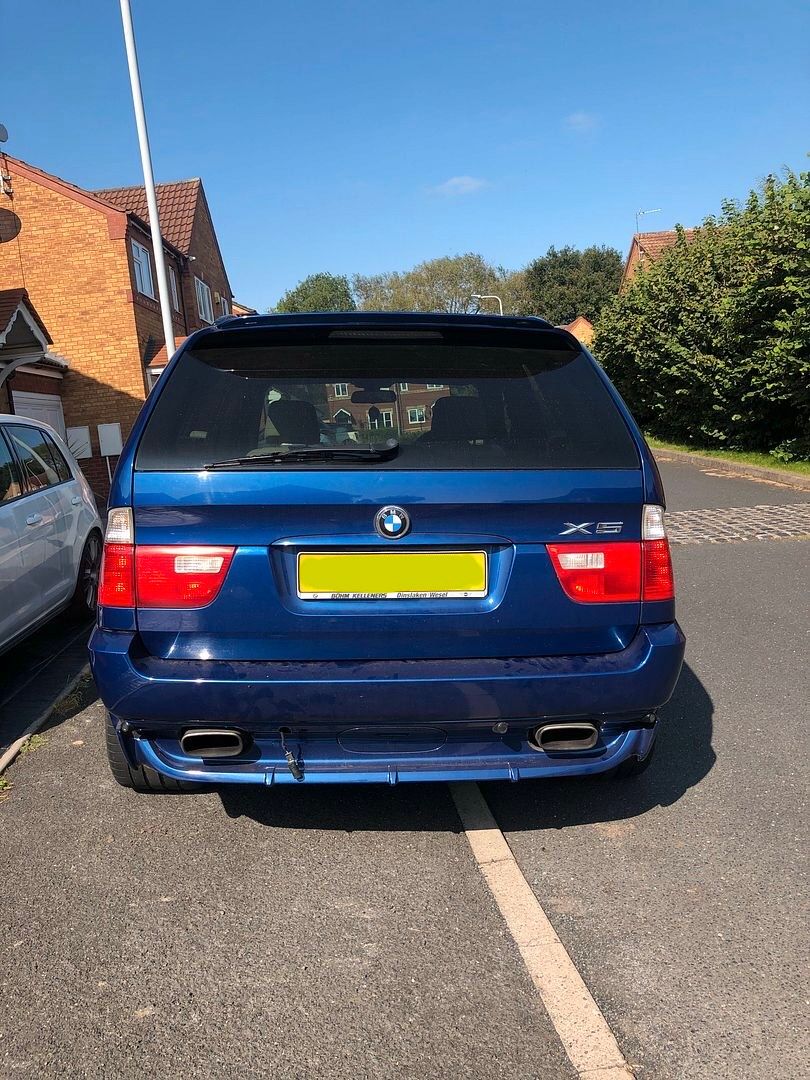
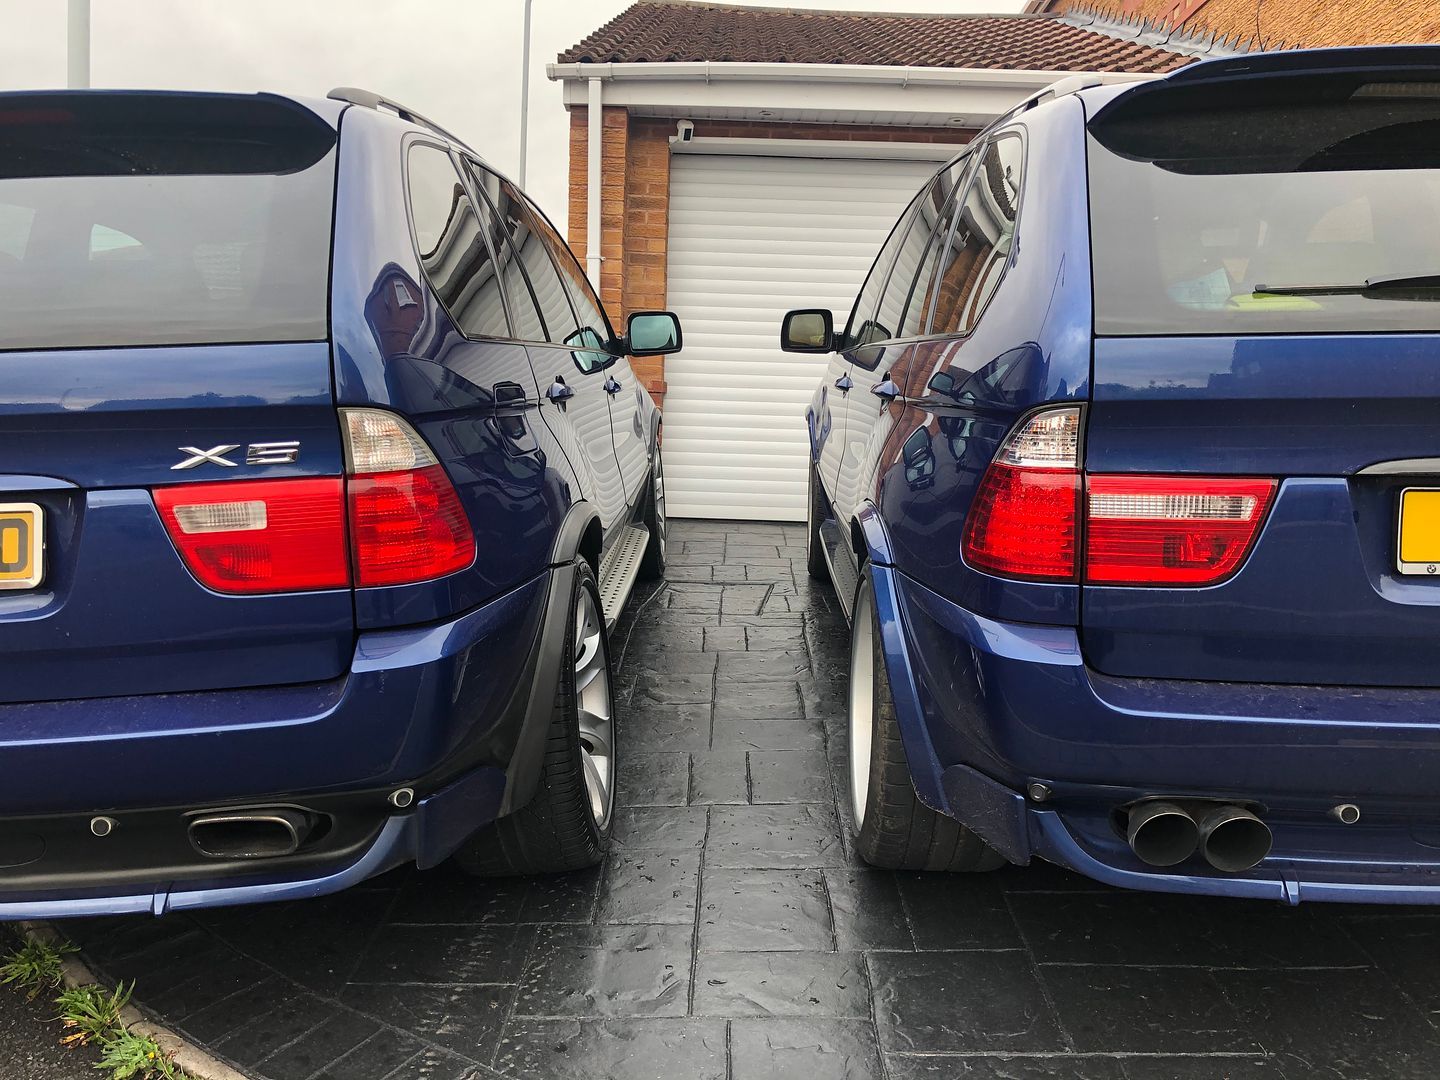
Now the rear bumpers have been swapped (with the Alpina's) and the front bumper is placed on it's ready to go to the bodyshop to have the extension kit resprayed again to freshen it up along with the whole front end. Rear bumper is still all good so no point spraying it just for the sake of it.

Image

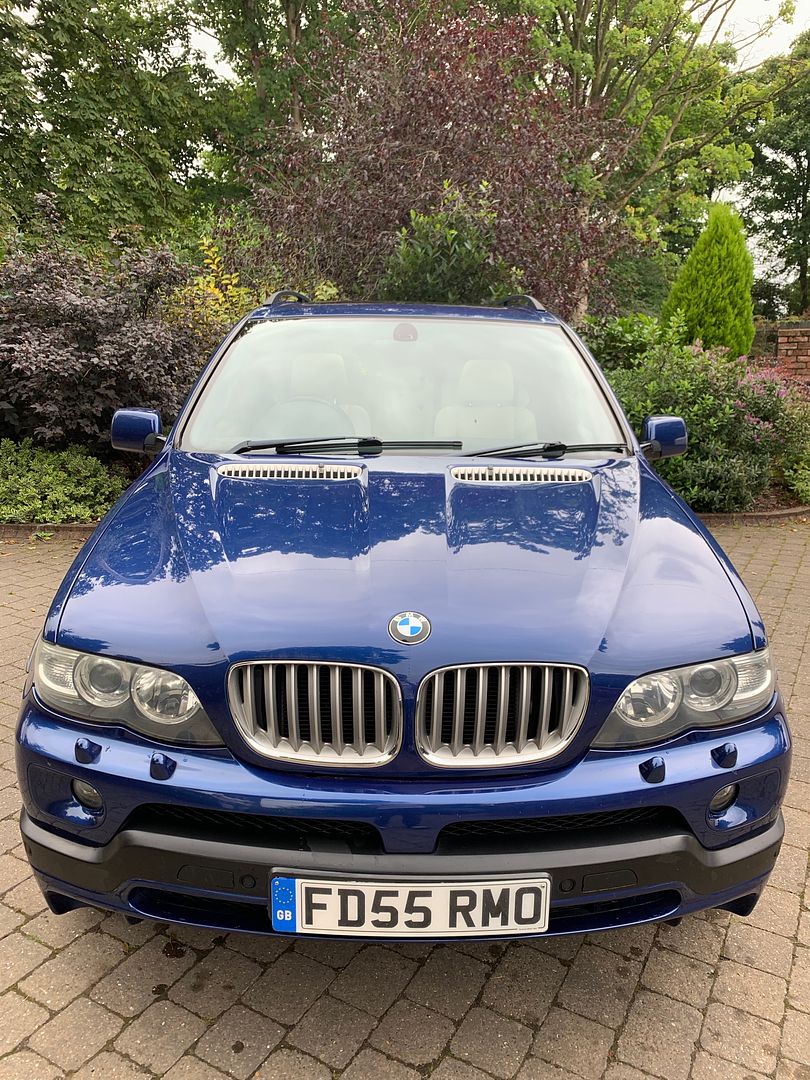
Old one is pretty much ready to go to its new home now.

Post Reply