Not joined yet? Register for free and enjoy features such as alerts, private messaging and viewing latest posts and topics.

Boot Switch/Latch

Discuss the problems with your X5 (E53).
Post Reply
User avatar
paulbryson75
Member
Member
Posts: 102
Joined: Sat Oct 02, 2010 1:48 pm
Location: Northern Ireland

Boot Switch/Latch

Post by paulbryson75 » Thu Dec 30, 2010 6:13 pm

Following the recent cold snap, not sure if connected or not, but my boot opening switch has ceased working. Tailgate switch working fine? The boot opens no problem when you use the key fob switch but will not open if you press the button on the boot itself. Any ideas???
Thanks as always????
Happy New Year BTW :D
02 X5 3.0d SE - Mods: Double exhaust, Angel eyes, orange bits removed! M-Sport steering wheel, e70 X5 Alloys, Aftermarket Sat/Nav DVD with rear screen, Webasto T91 Telestart, skid pan.

User avatar
bullethead
Member
Member
Posts: 392
Joined: Sat Jul 31, 2010 6:39 pm
Location: Westbury

Re: Boot Switch/Latch

Post by bullethead » Thu Dec 30, 2010 6:18 pm

Probably full of water and crud like my f'er

tubs
Newbie
Newbie
Posts: 45
Joined: Sat Jul 31, 2010 6:39 pm

Re: Boot Switch/Latch

Post by tubs » Thu Dec 30, 2010 9:47 pm

LIKE MINE, B"£$%$D !!!!

gchristofi
Member
Member
Posts: 303
Joined: Wed Nov 03, 2010 12:36 am

Re: Boot Switch/Latch

Post by gchristofi » Tue Mar 08, 2011 10:36 am

I've just found this problem too. Remote and cabin buttons open the tailgate fine, just the switch on the actual tailgate does nowt. How do you resolve this issue? Is it easy?

User avatar
marlin758
Member
Member
Posts: 94
Joined: Sun Jan 02, 2011 6:27 pm
Location: N Lancs

Re: Boot Switch/Latch

Post by marlin758 » Tue Mar 08, 2011 7:21 pm

I had the same problem - mine was that the two push switches inside the boot handle had failed - one kept randomly opening the tailgate on it's own whilst I was driving - a little disconcerting.

I priced a new handle - approx £170 painted or £120 unpainted - so I decided to have a go myself with the intention of buying a new one if I messed it up - The handle is a sealed unit so I had to cut the plastic back off in 3 sections to get at the circuit board inside - replacement switches were £1.09 each from Maplin.

I then tacked the plastic sections back with epoxy resin and then sealed with a black plastic bumper repair kit .

It looks virtually as it did before I butchered it and has been working fine for a couple of months now.
55 3.0 D Sport - Silver - Black leather - Carbon fibre badges - Rear view camera - Webasto remote control modification, HID Headlamps and all the rest are LED's.

gchristofi
Member
Member
Posts: 303
Joined: Wed Nov 03, 2010 12:36 am

Re: Boot Switch/Latch

Post by gchristofi » Tue Mar 08, 2011 8:15 pm

Good to see the Heath Robinson spirit lives on! A man after my own heart and in the interests of saving a few hard earned, I will take encouragement from your endeavours and have a go too! Cheers

User avatar
marlin758
Member
Member
Posts: 94
Joined: Sun Jan 02, 2011 6:27 pm
Location: N Lancs

Re: Boot Switch/Latch

Post by marlin758 » Wed Mar 09, 2011 10:41 pm

Heath Robinson ? It was a technical repair . :D

Good luck - the switches I used are Maplin Part number KR89W Switch 105A - they fit perfectly !

Apparently some (pre-facelift ?) have a rubber rear casing which can be cut off with a Stanley knife and resealed with silicone .
Mine is a hard plastic rear case which is bonded to the metal plate .

Took a while and a few cutting discs to cut it off but the thought of spending £170 for two £1 switches spurred me on .
It should be possible to cut it off in one piece , I cut the raised centre section off first thinking it would give me access to the switches but you have to remove the circuit board to get to both sides of it.

If you do it in more than one piece be careful with the crosscuts - I nicked one of the tracks on the board and had to solder a wire link on to repair it . I suppose it does sound a bit Heath Robinson :roll:

If you remove the number plate lenses first you can see which way the circuit board lies , the lamp holders are at each end of the board .
55 3.0 D Sport - Silver - Black leather - Carbon fibre badges - Rear view camera - Webasto remote control modification, HID Headlamps and all the rest are LED's.

gchristofi
Member
Member
Posts: 303
Joined: Wed Nov 03, 2010 12:36 am

Re: Boot Switch/Latch

Post by gchristofi » Wed Apr 13, 2011 5:13 pm

Thanks for the info. I've finally started tackling this. Got as far as proving it's the switch not working (as i can open the latch by shorting the the 2 middle connectors on the electric plug). Now I'm looking at this sealed unit, I can see it won't be easy but with your valuable advice I'm going to have a go. I think I need that luck!

gchristofi
Member
Member
Posts: 303
Joined: Wed Nov 03, 2010 12:36 am

Re: Boot Switch/Latch

Post by gchristofi » Wed Apr 13, 2011 10:09 pm

So I have done the fix.. in a.. erm, slightly more Heath Robinson way! Didn't fancy cutting the back off the sealed unit so went in through the rubber from the switch side.

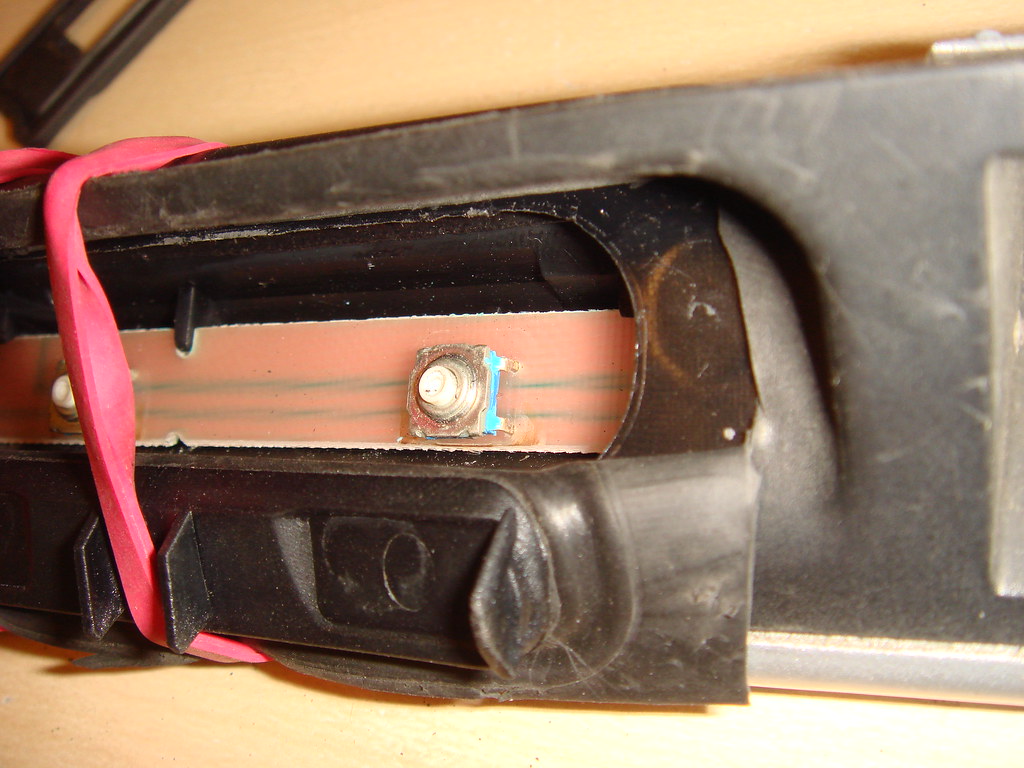
Cut a neat flap with stanley knife and remove rubber covers to reveal 2 switches
Image

This shows a close up of the micro switches. A bit of testing showed that the connectors of both switches were not making correct contact with the upper circuit of the pcb. Too many pressure cycles and I reckon the connectors have detached from the board. I tried re-flowing solder from this side to no avail (lots of heat!)
Image

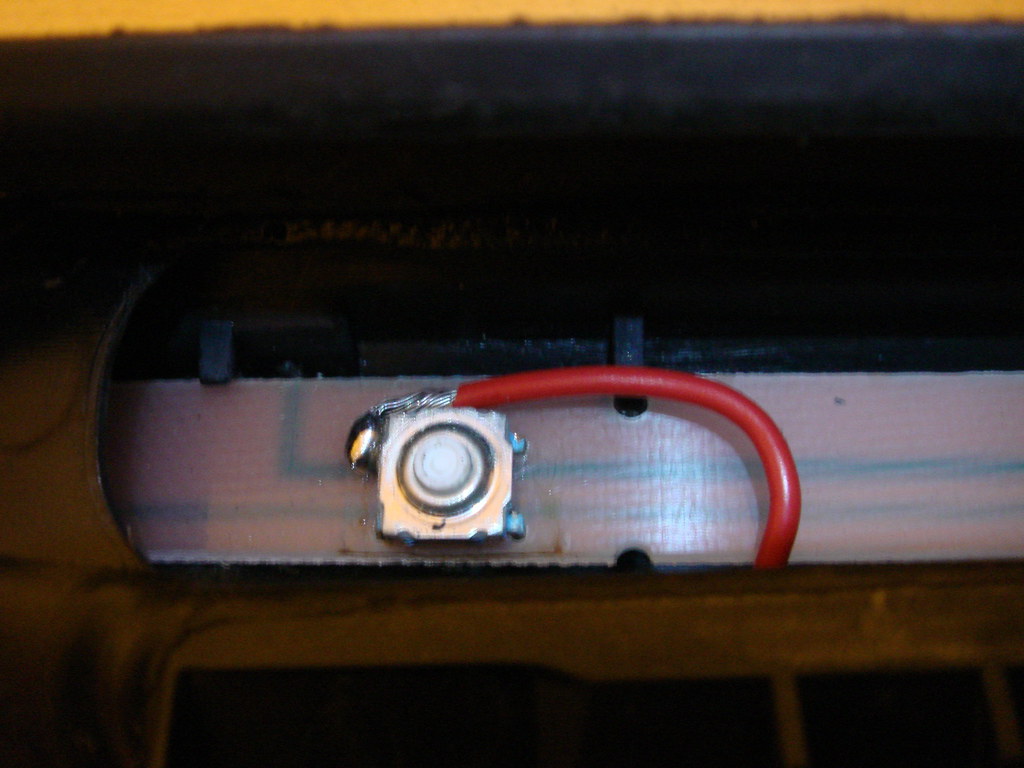
Since the lower connections of switches to pcb were ok, and the switches operating ok, decided to run a wire from the upper contacts of one swith directly to the appropriate wire of the connector. The plan is to complete the switch ciruit without using part of the pcb (thought it would be easier than getting access to back of pcb)
Image

The only way to run the wire was to separate the painted trim from the switch unit. This was probably the hardest bit but plenty of persuasion and a few broken (but unecessary) plastic retaining tabs and they did separate!
Image

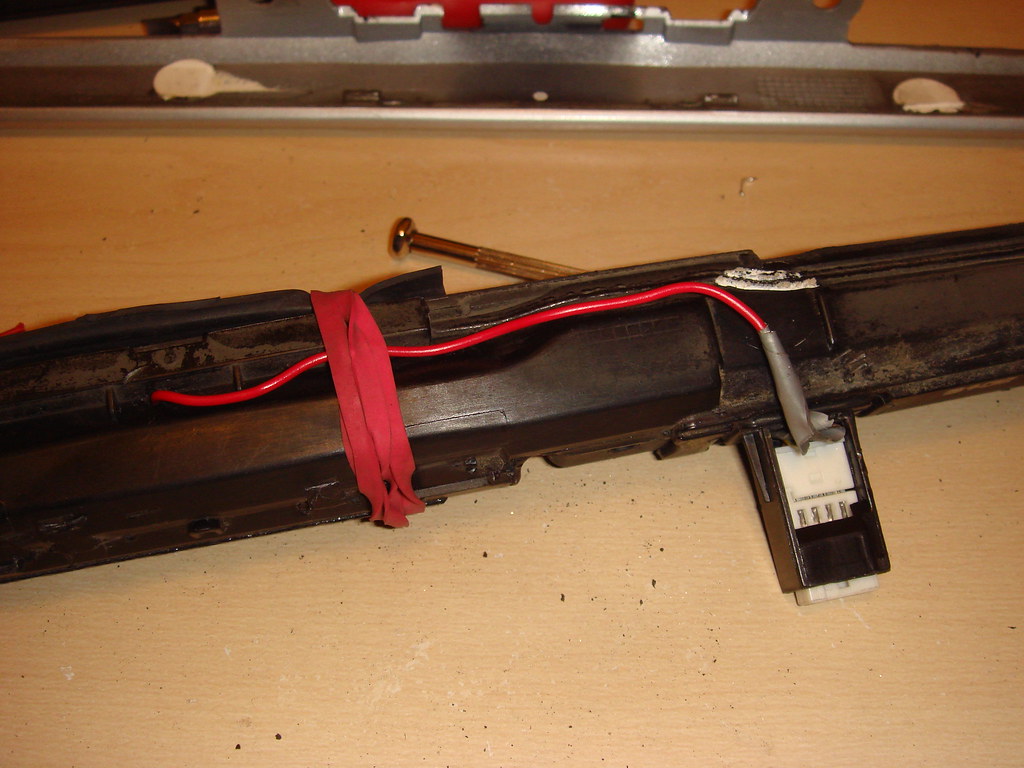
Drilled a hole through the sealed casing to pass the wire through and then along the back of the sealed unit to join original connector.
Image

Little bit of glue to hold the rubber back in place and everything is back on the car and working!! :roundel: Will also silicone seal around the edge of the switch rubber to make sure no water finds its way in. Hopefully, this should last a few years.

User avatar
paulbryson75
Member
Member
Posts: 102
Joined: Sat Oct 02, 2010 1:48 pm
Location: Northern Ireland

Re: Boot Switch/Latch

Post by paulbryson75 » Thu Apr 14, 2011 9:00 am

Great info - one question though were do you join the wire to the connector? to one of the pins - which one??
Cheers
Paul
02 X5 3.0d SE - Mods: Double exhaust, Angel eyes, orange bits removed! M-Sport steering wheel, e70 X5 Alloys, Aftermarket Sat/Nav DVD with rear screen, Webasto T91 Telestart, skid pan.

gchristofi
Member
Member
Posts: 303
Joined: Wed Nov 03, 2010 12:36 am

Re: Boot Switch/Latch

Post by gchristofi » Thu Apr 14, 2011 11:24 am

Hi Paul

If we say that in pictures 2 & 3 (close ups of switch), the upper switch connectors go to top circuit of pcb and bottom connectors to bottom circuit of pcb.
AND
In picture 4 (showing separated trim and red screw driver) number the pins on the connector as 1,2,3,4 from left to right.

THEN as per above:
-top circuit of pcb goes to pin 2 (where I connected my wire by splicing into existing wiring at connector)
-bottom ciruit of pcb goes to pin 3

i.e. to open the boot, the switches have to short the middle 2 pins of the connector.

cheers
Greg

Post Reply